But, you know how I am. Somehow I always find a way to be drawn to the absolute most expensive things no matter how simple they may be. I have about 7 quilling tools, all (with the exception of 1) less than $4 each. But, guess which one is my favorite? Yep, the ONE that cost about 8 times the price of a regular tool. :/ Oh, Sandy, what am I gonna do with you?
My favorite tool is in perfect shape but something inside me wants to purchase a bunch more, you know, just in case. Just incase what? I don't know. But there is no way I can purchase a bunch more of them for no reason. So, today I decided to make my own tool to quell my desire for a new gadget.
Made with basic household items this tool won't set you back very much. What's more, you can probably make yourself a whole hoard of them, if you like. Everybody has a hoarding gene, don't lie!
You will need:
- a super strong adhesive
- some basic hand needles
- a wire cutter
- some corks...YAY for corks (and Brooklyn Lager)!
- a file to file down the edge of the needle (sorry I forgot to include it in the pic)
- some paper strips to test your tool

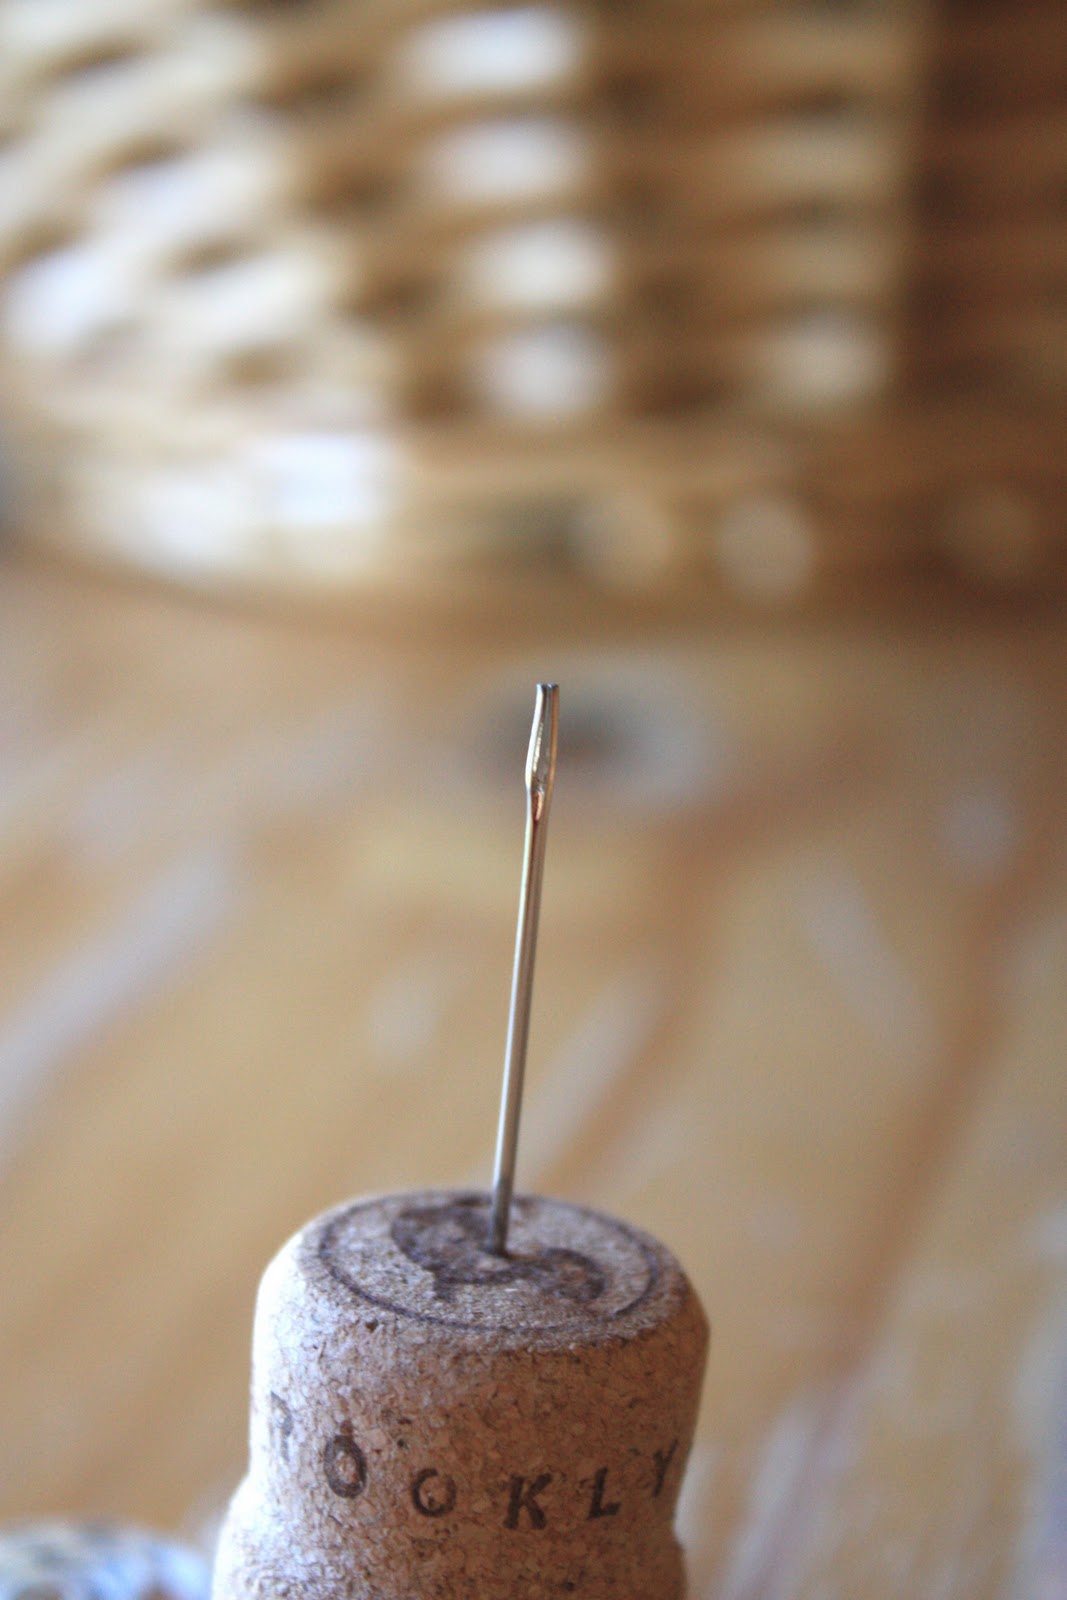
First, choose the sturdiest needle in the pack with the largest opening.

Slide it into the cork right down the middle. Once you have your opening, apply a dab of the adhesive to the end of the needle and slide it back in. Wait for it to dry.

Once dry, snip the end of the needle with the wire cutter.
It may require some pressure and a bit of wiggling but no worries, it'll snip.
File down the edge so you won't get cut. You can even use sandpaper.
Now lets test your strips. You can cut strips of any paper with and tool you prefer. Be it a ruler and some scissors, a paper cutter or, my recent personal favorite, a mini paper shredder.
Insert the strip into the opening, twirl and release from tool.

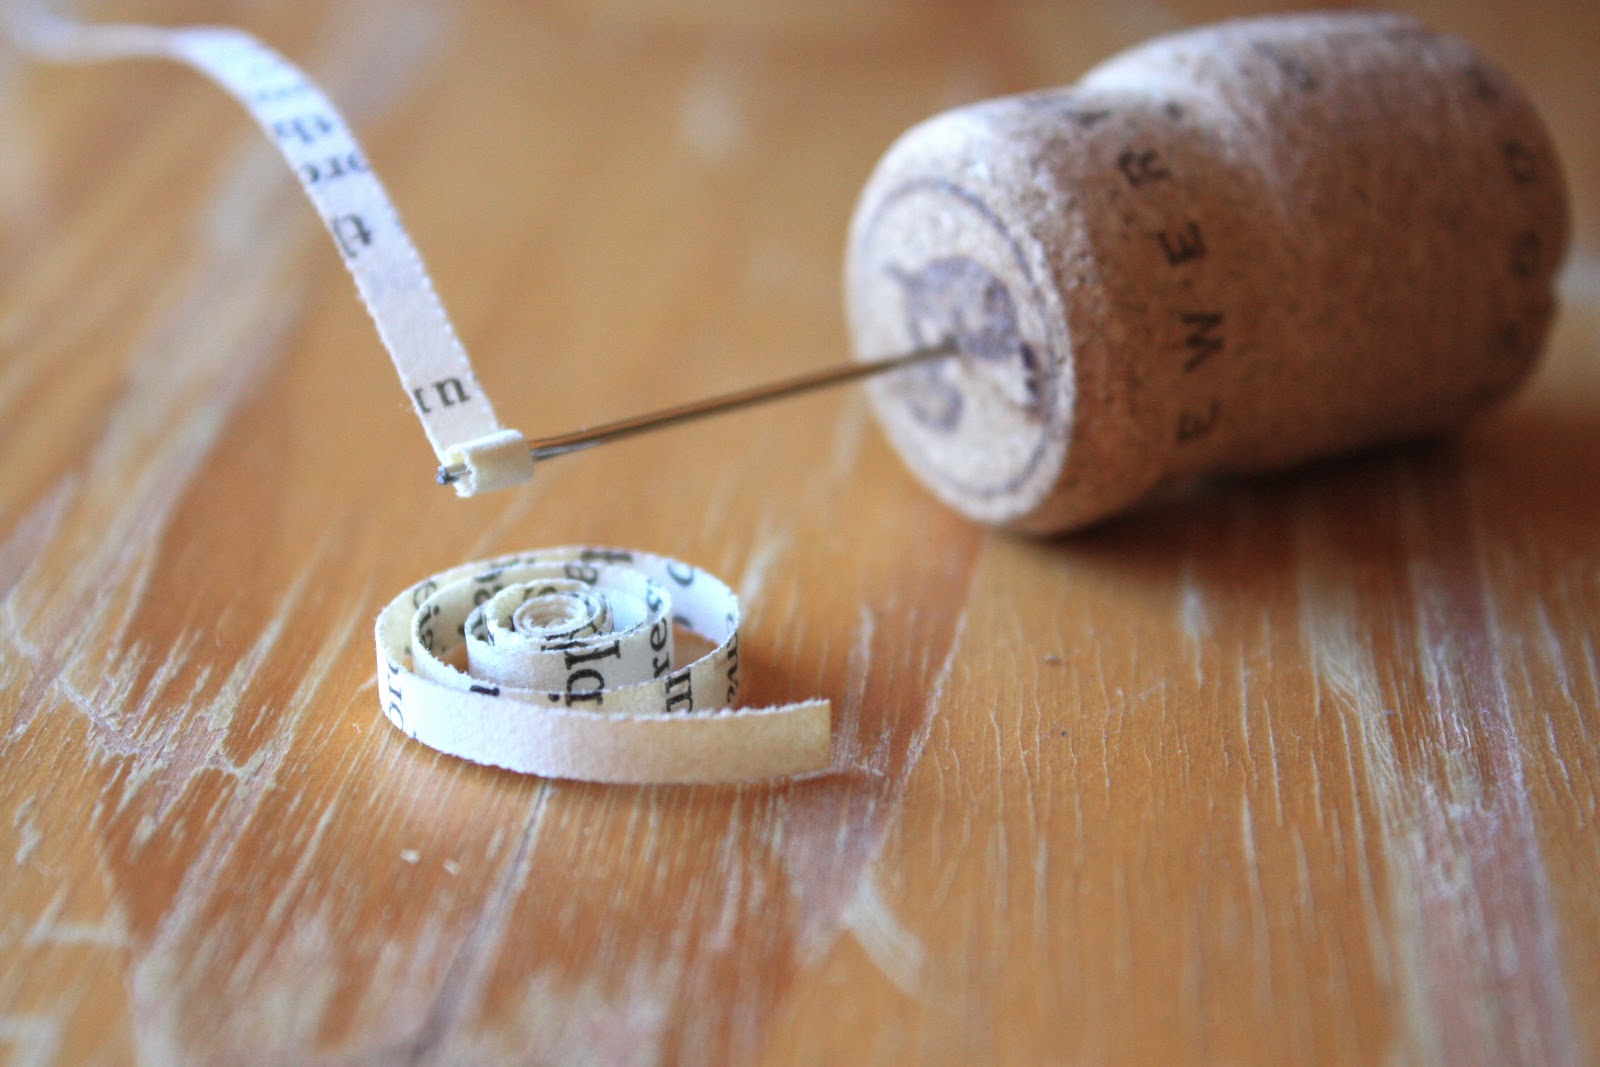


Have fun and create to your heart's content!
Each quilling tool produces unique results. For more, see my post here.
Happy Wednesday to you all!

nice tool, my hubby made me one with a wooden handle and a needle, it works well when you roll 2 strips together, because of the wider opening!
ReplyDeletePaula
Yah..such a nice idea...
ReplyDeleteThanks a lot for the tutorial!!
ReplyDeletegreat tutorial. thank you. inspiring :)
ReplyDeleteGreat tool! Thank you for sharing tutorial!
ReplyDeleteHugs!
Luiza Mallmann
decorarsustentavel.blogspot.com
What a great idea! Thank you for sharing!
ReplyDeleteOh thank you, Thank You! This is such a clever tool idea & I can't wait to try it!
ReplyDeleteVary good idea.i love craft . Thank you couse sharing your idea.
ReplyDeleteWonderfully done! So easy to do.
ReplyDeletediy home security systems
I just bought that paper shredder! :) thanks for the tip - how long did it take for yours to be delivered?
ReplyDeleteIt's a nice idea and you had provided very useful info..........
ReplyDeletewe provide house-cleaning
Thanks for this wonderful tutorial. I recently had a Pinterest party and we did a quilling project with these kinds of tools. I made sure to mention you in my post about it and a link back to this page.
ReplyDeleteI love your work. You are a Quilling Queen
Perfect!!! I received my first ever quilling set yesterday and am really struggling to get the paper to come out of the quilling tool, it is very frustrating. I think I will have to try one of these instead as it probably doesn't grip quite so tight :o)
ReplyDeletethanks for the tip, will save me a few dollars which is always welcome.
ReplyDeletecheers for that.
I enjoyed so much seeing how to make one's own quilling tool at home, and how you can use a mini-shredder to make the strips. I'm good at improvising... it was fun to see what you came up with! I look forward to following you .. I want to try my hand at quilling sometime. Granny Gee/Gloria :)))
ReplyDeleteIts like you read my mind! You seem to know so
ReplyDeletemuch about this, like you wrote the book in it or something.
I think that you can do with some pics to drive the message
home a bit, but other than that, this is fantastic blog.
An excellent read. I'll definitely be back.
My blog ... Best Brand name Laptop
Thanks for sharing this. I've been using a toothpick for the longest time and I think I'll try this one today, this one is much stronger than a toothpick :P and I don't have to buy from a site...
ReplyDeleteThank you!
This comment has been removed by the author.
ReplyDeleteWonderful idea...can't wait to DI-myself! Perhaps we could also try out empty ball pen refills (slotted at the tip) of varying thicknesses to get coils with different center-hole sizes.
ReplyDeleteAnyway, thanks very much for the sharing...your work is beautiful and very creative!
I Love Love this idea. Thank you so much, you can also do it using a small wood dowel for the handle, just make a small hole for the needle with a tiny nail and fill the hole with the glue, then insert the needle, I also made one using polly clay. The kind you bake. You can place the needle anywhere you want, then bake.
ReplyDeleteWhat a very neat idea.. thank you for sharing.
ReplyDeletejust wanted to let you know that I linked back to this in my post!
ReplyDeletehttp://wildlywritten.wordpress.com/2012/09/26/not-all-quills-are-so-prickly/
thanks for the great tutorial :)
I wanted to thank you for this great read!! I definitely enjoyed every little bit of it, I have you bookmarked to check out all the new stuff you post. frontpoint security reviews
ReplyDelete